Create and Edit Guidance (If Permitted)
Purpose
Create new guidance entries and maintain existing ones so teams have reliable, up-to-date procedures.
This page is primarily for supervisors or authorized staff.
Steps (create a new instruction)
- Open App > Guidance.
- Select the Add action (often a plus button).
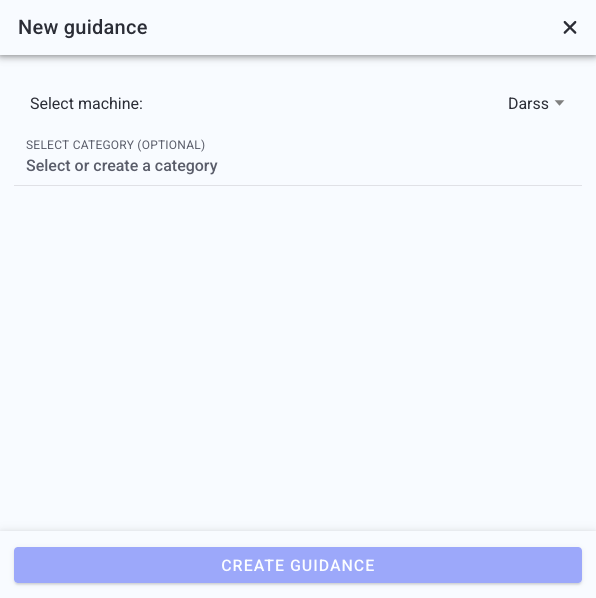
- Select one or more machines.
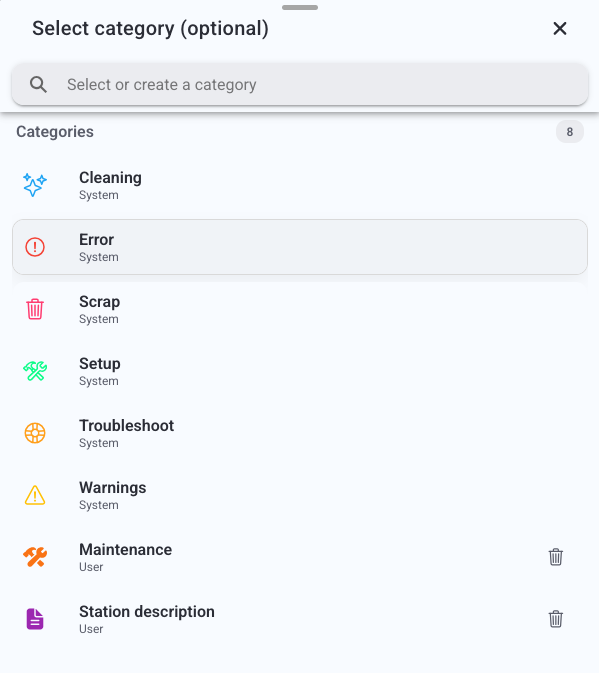
- Select an existing category, or create a new category (name, icon, color).
- Continue into the edit view to create the new guidance entry.
Steps (edit an existing instruction)
- Open App > Guidance.
- Find and open the instruction.
- Select Edit (if available).
- Update steps and content.
- Select Save.
What users see (edit view)
Choose a category for the new guidance:
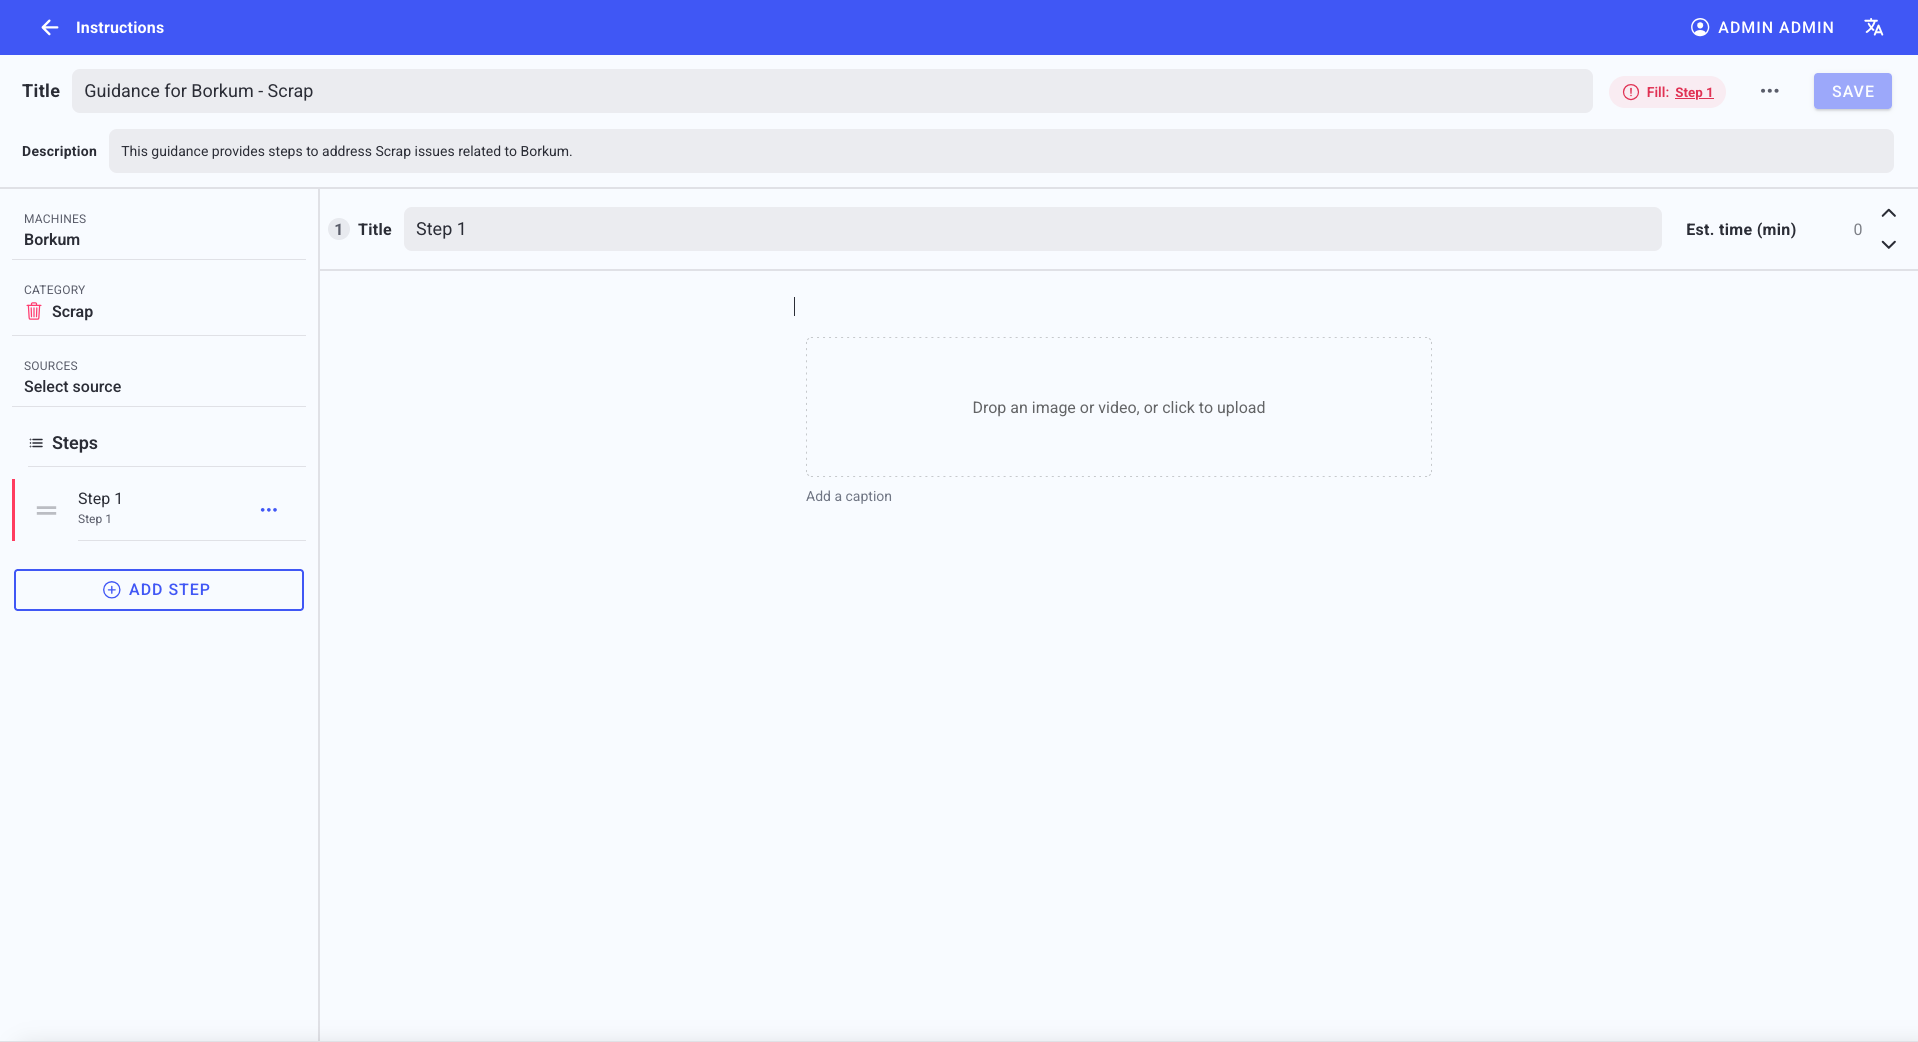
Depending on your deployment, the edit view can include:
- title and description (often auto-generated, editable)
- a validation indicator (required fields must be complete before saving)
- a details menu (for example version info, copy link, delete)
- a step sidebar:
- list of steps
- add step
- duplicate step
- delete step
- a step editor panel:
- step title
- estimated completion time
- content editor (text, media, lists, checklists)
- drag and drop reordering
- an unsaved-changes warning if you leave without saving
Best practices
- Keep step titles short and action-oriented.
- Use photos or short videos when it improves correctness and safety.
- Prefer one clear action per step.
- If your deployment uses instruction types (for example: troubleshooting, warning correction, scrap reduction), use them consistently.
- Review and update guidance after process or machine changes.
Troubleshooting
- You cannot create or edit guidance -> Missing permission -> Request access from your admin -> Escalate with your username and the action you tried
- Save is disabled -> Required fields missing -> Complete required fields (title, steps, category) and retry -> Escalate with a screenshot of the validation indicator if unclear