Manage Alarms
Purpose
Use Manage Alarms to configure scrap-related alarms per machine. These alarms can trigger prominent notifications for operators when thresholds are exceeded.
This page is primarily for supervisors or authorized staff.
Steps (create an alarm)
- Open App > Apps.
- Go to the Manage Alarms card/panel.
- Select the target machine using the machine selector.
- Select + ADD.
- Select the alarm type:
- Total scrap alarm: triggers on overall scrap percentage
- Single NIO sensor alarm: triggers on a specific scrap sensor
- Fill in the fields (varies by type):
- title
- threshold (%)
- time window (minutes)
- sensor selection (for single-sensor alarms)
- Select SAVE.
Steps (edit or delete an alarm)
- Open App > Apps and go to Manage Alarms.
- Select the target machine.
- Select an existing alarm from the list to open the edit dialog.
- Select SAVE to persist changes, or select the trash icon to delete.
What users see
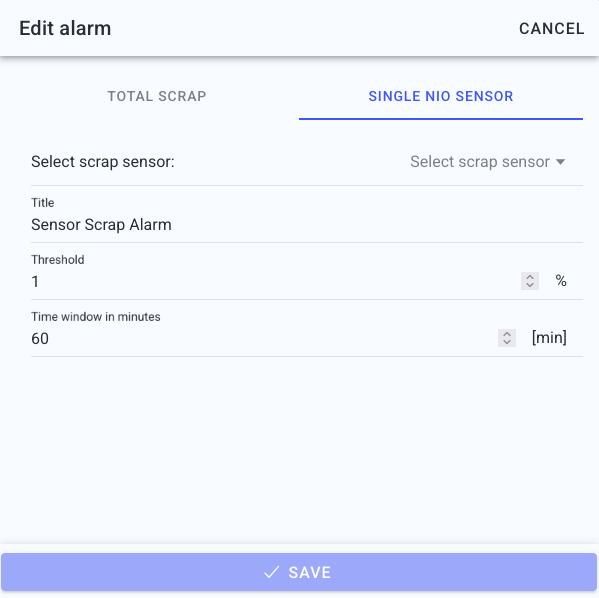
- A Manage Alarms panel on the Apps overview screen.
- A machine selector (often top-right) that scopes all alarms to one machine.
- A list of alarms for the selected machine (name/ID, type, timestamp, delete).
- A dialog with two tabs:
- Total scrap alarm
- Single NIO sensor alarm
When an alarm triggers, operators typically see a full-screen notification with:
- red background and warning icon
- alarm text including machine name and exceeded condition
- an Acknowledge button
Best practices
- Start with conservative thresholds and adjust based on real production behavior.
- Use a time window that avoids noisy short spikes.
- Coordinate thresholds with quality/maintenance so escalation is predictable.
Troubleshooting
-
You cannot add or edit alarms -> Missing permissions -> Ask an authorized supervisor to apply the change -> Request the required role/permission from your admin
-
Alarms trigger too often -> Threshold too low or time window too short -> Increase threshold and/or time window, then monitor -> Review with quality/maintenance if unsure